Ultimate Guide to Mastering Home Solar Installation Techniques for Beginners
As the world increasingly shifts towards sustainable energy solutions, home solar installation stands out as a practical choice for environmentally conscious homeowners.
According to the Solar Energy Industries Association (SEIA), residential solar installations soared by 14% in 2022, demonstrating a growing recognition of the substantial benefits that solar energy can provide.
Homeowners can significantly reduce their electricity bills, with potential savings averaging between $10,000 to $30,000 over the lifespan of a solar system.
Additionally, with an average return on investment of around 20% and the added advantage of tax credits and incentives, the economics of home solar installation have never been more favorable.
This guide will delve into the essential techniques for beginners, enabling aspiring solar enthusiasts to harness these advantages while contributing to a greener planet.
Essential Tools and Materials Needed for DIY Solar Panel Installation
Embarking on a DIY solar panel installation project requires an understanding of essential tools and materials that guarantee efficiency and effectiveness. According to the U.S. Department of Energy, solar power generation has seen an exponential increase of over 167% from 2015 to 2020, reflecting a growing interest in sustainable energy solutions at home. To successfully tap into this potential, beginners should gather tools like a multimeter for electrical diagnostics, a solar panel mounting kit, and appropriate safety gear such as gloves and goggles.
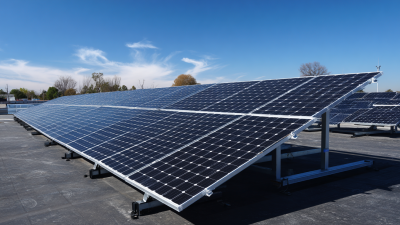
In addition to tools, having the right materials is crucial. This includes high-quality solar panels, inverter systems, and durable wiring, as outlined in the National Renewable Energy Laboratory's reports on solar technology. For instance, the typical residential solar panel system usually employs approximately 20-25 panels for optimal performance, complemented by a robust inverter capable of converting DC to AC power efficiently. These components not only enhance energy production but also ensure the longevity of the solar installation, thereby maximizing return on investment while contributing to a greener planet.
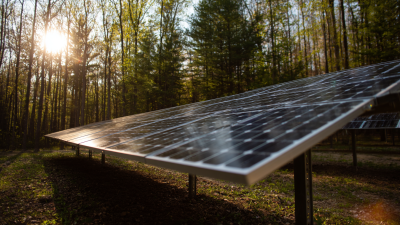
Solar Panel Installation Tools and Materials
Understanding Different Types of Solar Panels and Their Benefits
When considering solar energy for your home, understanding the different types of solar panels is crucial for making an informed decision. The three main types of solar panels available today are Monocrystalline, Polycrystalline, and Thin-Film.
According to the International Energy Agency, Monocrystalline panels, known for their high efficiency and sleek appearance, often achieve efficiencies of over 20%. This efficiency translates to more energy production in a smaller space, making them an ideal choice for homeowners with limited roof area.
On the other hand, Polycrystalline panels, which are typically less expensive, offer an efficiency range of about 15-17%. While they may require more space due to their lower efficiency, they still provide a compelling option for budget-conscious consumers, as they maintain a decent performance-to-cost ratio.
Thin-Film solar panels, noted for their lightweight and flexible design, are suitable for large-scale installations but generally have lower efficiency rates of around 10-12%. A report by the National Renewable Energy Laboratory highlights that while Thin-Film panels may take up more space, they can be advantageous in certain applications due to their versatility and lower material costs.
In summary, the choice of solar panel type greatly depends on your specific needs, budget, and property characteristics. With advancements in technology and increasing accessibility, understanding these differences can empower homeowners to choose the best system for their energy goals.
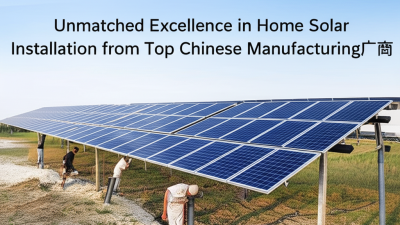
Step-by-Step Process for Installing Solar Panels on Your Roof
Installing solar panels on your roof may seem daunting, but with the right approach, anyone can master it. The first step involves assessing your roof’s suitability for solar installation. Check the roof's orientation; south-facing roofs typically receive the most sunlight. Next, examine the condition of your roof to ensure it can support the weight of solar panels. If any repairs are needed, it's essential to address those before proceeding.
Once you've confirmed that your roof is in good shape, you'll need to plan your solar panel layout. Determine how many panels you require based on your energy needs and available space. Mark the locations for panel placement, ensuring there’s enough room for wiring and installation. The next step is to install mounting brackets, which will securely hold your panels in place. After the brackets are installed, you can attach the solar panels, followed by connecting them to the inverter and electrical system. Following a clear, step-by-step process helps ensure a successful solar installation that maximizes efficiency and longevity for your home.
Common Mistakes to Avoid During Home Solar Installation
When embarking on a home solar installation project, avoiding common pitfalls is crucial for ensuring a smooth and successful process. One of the most frequent mistakes beginners make is underestimating the importance of proper site assessment. Before installing solar panels, assessing the orientation, angle, and shading of your roof can significantly impact the efficiency of your system. Ensure that your panels are positioned to maximize sun exposure throughout the day to optimize energy production.
Another common mistake is neglecting the wiring and electrical connections. Many DIY enthusiasts, eager to start their project, may overlook the need for quality wiring and secure connections. Faulty wiring can lead to safety hazards and system inefficiencies. It’s essential to follow local electrical codes and consult with a professional electrician if you are uncertain about the electrical aspects of your installation. Careful planning and thorough execution will not only enhance the performance of your solar system but also prolong its lifespan.
Maintaining and Troubleshooting Your Solar Power System After Installation
After successfully installing your home solar power system, the next crucial step is maintaining and troubleshooting it effectively to ensure optimal performance. Regular maintenance is essential for maximizing energy output and prolonging the life of your solar panels. Start by routinely cleaning the panels to remove dirt and debris that can obstruct sunlight. It's also important to inspect the inverter, as it is the system's heart that converts solar energy into usable electricity. Look for any warning lights or errors, and familiarize yourself with the manufacturer’s instructions to troubleshoot common issues.
In case of performance drops or system errors, it’s vital to have a systematic approach to troubleshooting. Begin by checking the orientation and angle of your panels; improper positioning can lead to decreased efficiency. If the system shows no output, verify the circuit breakers and fuses, as these are common points of failure. Additionally, keeping an eye on any shading from trees or adjacent structures can prevent significant drops in performance. By staying aware of these factors and regularly conducting inspections, you can ensure that your solar power system operates efficiently for years to come.